
As an Amazon Associate I earn from qualifying purchases.
Are your acrylic nails becoming more of a hassle than a highlight? You might be thinking about removing them but are worried about damaging your natural nails.
Don’t fret! With the right approach, you can safely and effectively remove acrylic nails at home, saving both time and money. Imagine the satisfaction of gently freeing your nails, giving them room to breathe, and feeling that natural touch once again.
You’ll discover that removing acrylic nails is not just a task but a rejuvenating experience for your nails. Stick with us, and you’ll learn a step-by-step method that ensures minimal damage and maximum ease. Ready to give your nails the care they deserve? Let’s dive in!
Preparation Essentials
Gather essential tools for removing acrylic nails safely. Acetone, cotton balls, foil, and a nail file are key items. Proper preparation ensures the process is smooth and minimizes damage to your nails.
Removing acrylic nails at home can be a straightforward process if you prepare effectively. The right preparation not only saves time but also ensures that your nails remain healthy and damage-free. It’s essential to gather the right tools and set up a comfortable space before starting. By doing so, you create a hassle-free experience that makes the removal process smooth and easy. Let’s dive into the preparation essentials that will set you up for success.
Gather Necessary Tools
First, make a checklist of the tools you’ll need. Acetone, cotton balls, aluminum foil, and a nail file are vital. You might also want to have cuticle oil ready for aftercare. Each tool plays a specific role in the process. Acetone helps dissolve the acrylic, while the nail file aids in removing the top layer. Think of cotton balls and foil as your trusty partners—they help the acetone work effectively. Have you ever found yourself halfway through a process only to realize you’re missing a key item? It’s frustrating. Avoid that by gathering everything you need before you start. Being prepared makes the process more efficient and less stressful.
Choose A Comfortable Space
Your surroundings can greatly impact your experience. Opt for a comfortable space with good lighting, like your living room or bathroom. A well-lit area helps you see better, ensuring precision and safety. Consider using a table or flat surface. This gives you room to spread out your tools and avoid clutter. You wouldn’t want to accidentally knock over a bottle of acetone! Do you have a favorite spot where you feel relaxed? Choose that space for nail removal. Feeling at ease can make the task more enjoyable and less daunting. Plus, a comfy chair or seat can prevent backaches during the process. Preparation is key to a smooth acrylic nail removal journey. With the right tools and space, you’ll be ready to tackle the task efficiently.
:max_bytes(150000):strip_icc()/How-to-Safely-Remove-Fake-Nails-54dacd3f9648421488d2ad099fb9d721.png)
Credit: www.byrdie.com
Cut And File Nails
Removing acrylic nails at home starts with cutting and filing. This step is crucial for an easy and safe removal process. Properly cutting and filing saves time. It also helps prevent damage to natural nails. Let’s explore each step carefully.
Trim Acrylic Length
Begin by trimming the acrylic nails to a manageable length. Use sharp nail clippers for a clean cut. Cut as close to the natural nail as possible. Shorter nails are easier to work with. They also reduce the risk of breakage during removal.
Ensure you have good lighting. This helps you see the edges clearly. Take your time. Avoid rushing to prevent accidental cuts or damage.
File Surface Layer
After trimming, focus on filing the surface layer. Use a coarse nail file for this task. The goal is to thin the acrylic layer. This makes the removal process easier and faster.
File gently in one direction. Avoid using too much pressure. This protects the natural nail underneath. Filing creates a rough surface that allows acetone to penetrate better.
Check your progress frequently. Stop filing once the acrylic looks thin and dull. This step preps the nails for the next removal stage.
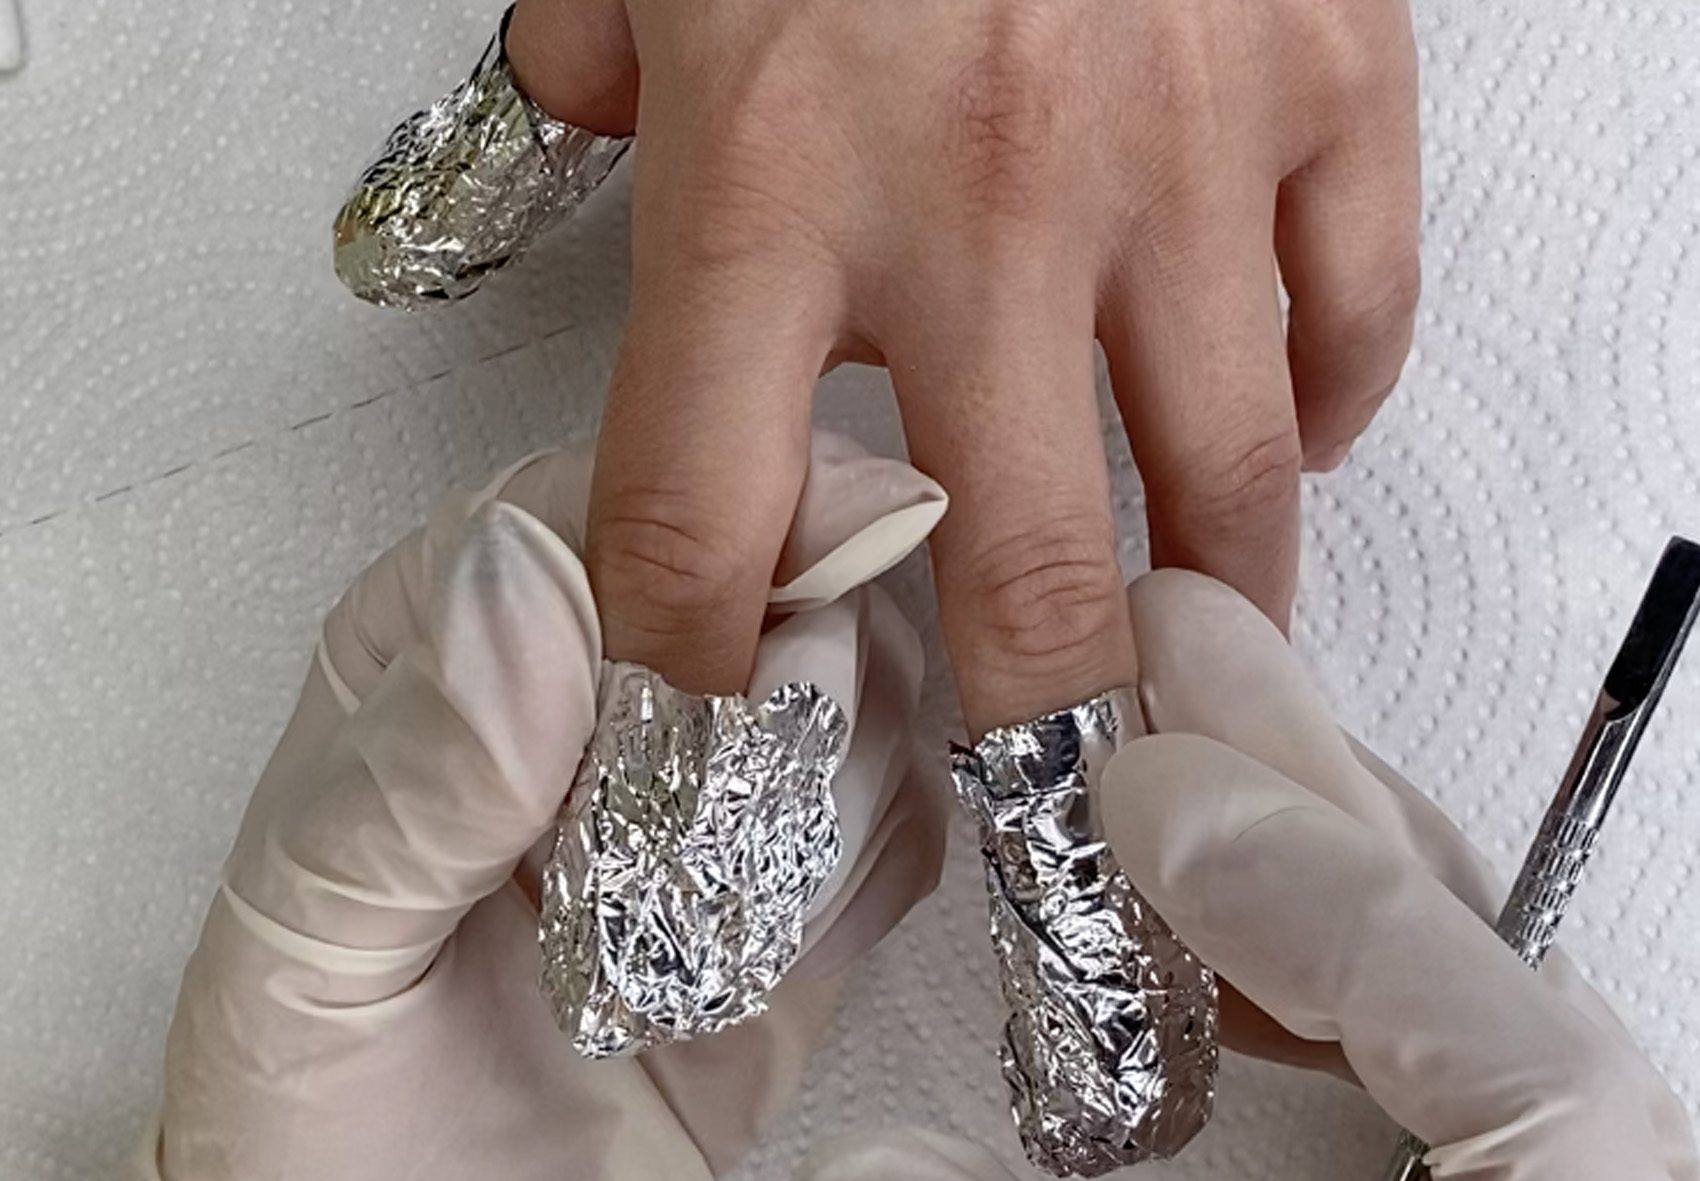
Soak Off Method
Gently remove acrylic nails using the soak-off method. Soak them in acetone for 20-30 minutes. Softened nails can then be carefully peeled away, minimizing damage to natural nails.
Removing acrylic nails at home can seem daunting, but the Soak Off Method is a reliable and straightforward approach. This method is gentle on your natural nails and helps ensure the acrylics come off without causing damage. With a few simple steps, you can effectively remove your acrylics right in the comfort of your own home.
Use Acetone Solution
Start by gathering pure acetone, which you can find at most beauty supply stores or online. Acetone is crucial because it efficiently breaks down the acrylic material. Make sure to use 100% acetone for the best results. Pour the acetone into a small bowl. You want enough to cover your nails completely. Before you begin, protect the skin around your nails by applying petroleum jelly. This helps prevent dryness and irritation from the acetone.
Wrap Nails In Foil
Once you’ve prepped your nails and acetone, it’s time to wrap them. Cut small squares of aluminum foil and grab some cotton balls. Soak the cotton balls in the acetone and place one on each nail. Wrap each finger with the foil tightly. The foil keeps the acetone-soaked cotton ball in place and helps trap heat. This step is essential as it speeds up the process, making the acrylic easier to remove. Leave the foil wraps on for about 20-30 minutes. During this time, you can relax, watch your favorite show, or even read a book. After the time is up, gently check one nail to see if the acrylic is loosening. If the acrylic is still stubborn, rewrap your nails and wait a little longer. Patience is key here—rushing can lead to damage. Have you ever had a frustrating experience trying to remove acrylics? With the right tools and patience, you can master the soak off method and keep your nails healthy.
Credit: www.raycochrane.co.uk
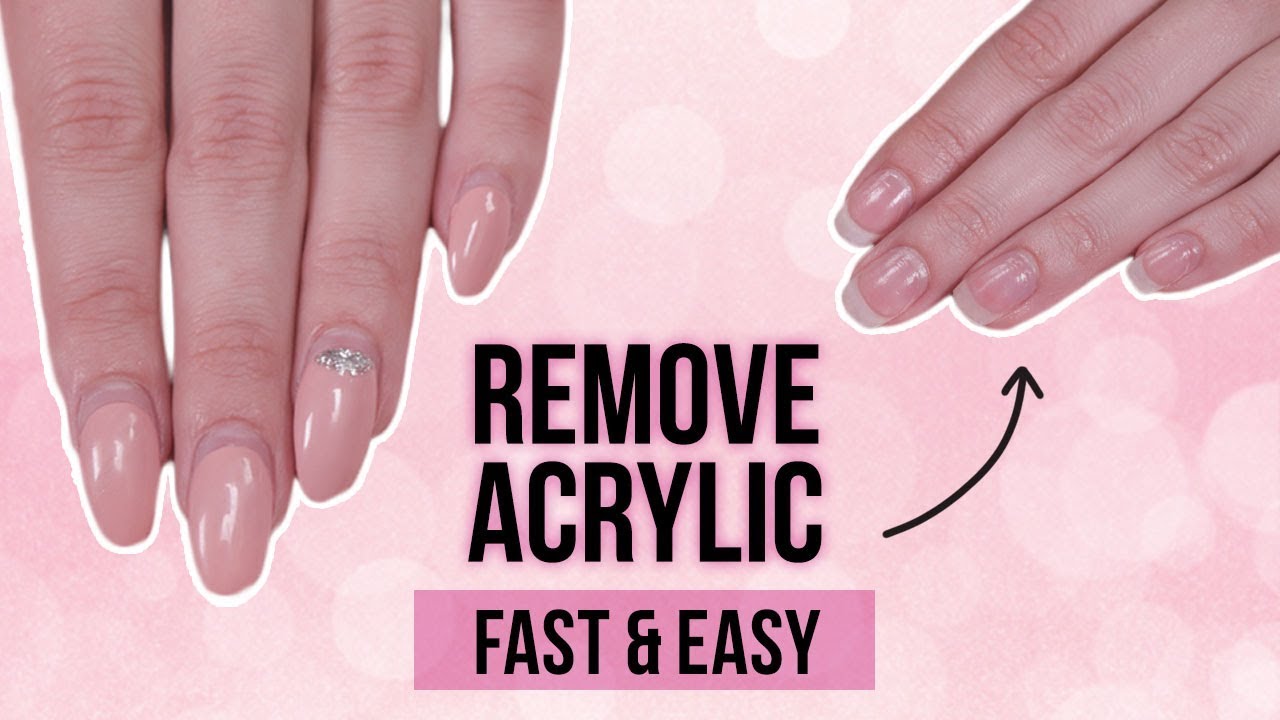
Remove Acrylic Residue
After soaking off acrylic nails, some residue may remain. This leftover residue can make your nails feel rough. Removing it properly ensures a smooth finish. It also prepares your nails for a new look.
Scrape Off Gently
Start by using a cuticle pusher. Gently scrape off any remaining acrylic. Be careful not to damage your natural nails. Apply light pressure to avoid injuries. Slow and steady wins this race.
Buff Remaining Layers
Once you’ve scraped off the residue, it’s time to buff. Use a nail buffer for this task. Buff your nails to remove the final traces of acrylic. This will leave your nails smooth and ready for the next step. Make sure to buff in one direction for the best results.
Moisturize And Heal
Removing acrylic nails can be a harsh process for your natural nails and skin. Once the acrylics are off, your nails might feel weak and your skin dry. This is where the magic of moisturizing and healing comes into play. Imagine your nails as a garden that needs nurturing after a storm. By focusing on moisture and healing, you can restore the health and vitality of your nails and skin. Let’s dive into some practical steps to help you rejuvenate your hands.
Apply Cuticle Oil
Cuticle oil is your best friend when it comes to nail recovery. It hydrates and strengthens the cuticles, making them less prone to splitting and tearing. Applying cuticle oil is simple and quick. Just take a few drops and massage it gently into your cuticles and nails.
Make this a daily habit. You can do it before bedtime or while watching your favorite show. The soothing sensation can also be a relaxing ritual. Think of it as a spa moment for your fingertips. Notice how your nails become shinier and healthier over time.
Use Hand Cream
Hand cream is essential for keeping your skin hydrated. After removing acrylic nails, your skin might feel rough and dry. A good hand cream can replenish lost moisture and leave your skin soft and supple.
Carry a small tube of hand cream with you. Apply it after washing your hands or whenever they feel dry. It’s a great way to pamper your hands throughout the day. Choose creams with natural ingredients like shea butter or almond oil for extra nourishment.
Have you ever wondered why your hands feel rough after a busy day? It’s often because they need more moisture. By regularly using hand cream, you can prevent dryness and keep your hands looking youthful and healthy.
These steps are more than just beauty routines—they’re investments in your self-care. How do you plan to make moisturizing and healing a part of your nail care ritual?
Credit: www.youtube.com
Alternative Methods
Removing acrylic nails safely at home can be tricky. Many people prefer alternative methods for a gentler approach. These methods avoid harsh chemicals and reduce nail damage. Explore some effective techniques that work well.
Non-acetone Options
Non-acetone nail polish removers offer a gentler solution. They are less harsh than acetone, causing less damage. Soak cotton balls in non-acetone remover. Place them over your nails and wrap with foil. Wait for 20 minutes. The acrylic should begin to loosen. Gently use a wooden stick to lift the edges. Be patient and avoid force.
Warm water is another simple method. Soak your nails in warm, soapy water for 30 minutes. This helps soften the acrylic. Use a soft nail file to gently scrape the acrylic. Repeat the process if needed. Always moisturize your nails afterward.
Professional Assistance
Visiting a nail salon can be the safest choice. Professionals use specialized tools to remove acrylics. They ensure minimal damage to natural nails. This method saves time and effort. Plus, you get expert care and advice.
If your nails are sensitive, consult a nail technician. They can offer personalized care and recommendations. Professional assistance ensures a smooth and stress-free experience. It might cost more but offers peace of mind. Your nails will thank you!
Tips For Nail Care
Proper nail care is crucial after removing acrylic nails. It ensures nails remain healthy and strong. Following a few simple tips can make a big difference. These tips help in maintaining the health and appearance of your nails.
Strengthening Treatments
Use a nail strengthener regularly. It helps rebuild and fortify your nails. Strengtheners contain vitamins and proteins. These nutrients support nail growth and repair. Apply the treatment as directed on the package. Consistency is key for effective results.
Avoiding Damage
Be gentle with your nails. Avoid using them as tools. This reduces the risk of breakage and damage. Keep your nails trimmed short. Short nails are less prone to snagging and tearing. Moisturize your nails and cuticles daily. Moisture keeps them flexible and less likely to break.
Frequently Asked Questions
How Do I Safely Remove Acrylic Nails?
To safely remove acrylic nails, start by trimming them down. Soak your nails in acetone for about 20 minutes. Use a cuticle pusher to gently lift the acrylic. Repeat the process if needed. Moisturize your hands afterward to prevent dryness.
Can I Remove Acrylic Nails At Home?
Yes, you can remove acrylic nails at home. Use acetone, foil, and cotton balls for effective removal. Soak nails in acetone, wrapped in foil, for 20 minutes. Gently scrape off the softened acrylic. Moisturize your nails to keep them healthy.
What Tools Do I Need To Remove Acrylic Nails?
You need a nail clipper, acetone, cotton balls, and aluminum foil. A cuticle pusher will help lift the acrylic. Nail buffer can smooth any rough edges. Moisturizer is essential to hydrate your nails after removal.
How Long Does Acrylic Removal Take?
Acrylic nail removal typically takes 30 to 45 minutes. Soaking nails in acetone is the longest step, around 20 minutes. The process may vary depending on nail thickness. Be patient for best results.
Conclusion
Removing acrylic nails is easy with the right steps. Start by gathering your tools. File the nails to remove shine. Soak them in acetone for 30 minutes. Use a wooden stick to gently lift the acrylic. Buff and moisturize your nails afterwards.
This keeps them healthy and smooth. Regular nail care is crucial for nail health. Try these simple methods at home. Save time and money. Enjoy beautiful, natural nails without hassle. Follow these tips for the best results. Feel confident with your nail routine.
Share your success with friends and family. Happy nail care!
As an Amazon Associate I earn from qualifying purchases.