
As an Amazon Associate I earn from qualifying purchases.
Have you ever found yourself frustrated with those pesky nail heads sticking out of your beautifully finished woodwork? You’re not alone.
Many DIY enthusiasts and professionals alike face this annoying problem. But there’s a simple, effective solution that can save you time and improve your results: the tool nail set. Imagine completing your next project with perfectly flush nails, achieving a smooth, flawless finish that showcases your craftsmanship.
This guide will reveal how you can master the use of a tool nail set, turning a daunting task into a breeze. By the end, you’ll be equipped with the know-how to enhance your woodworking skills and transform your projects. Ready to discover the secret to seamless woodwork? Keep reading to learn how this small tool can make a big impact on your DIY endeavors.
Choosing The Right Nail Set
Choosing the right nail set is crucial for any project that involves finishing woodwork. Whether you’re a seasoned DIY enthusiast or just starting, picking the correct tool can make all the difference in achieving a professional look. In this section, we’ll explore how you can select the perfect nail set for your needs.
Understanding Nail Set Sizes
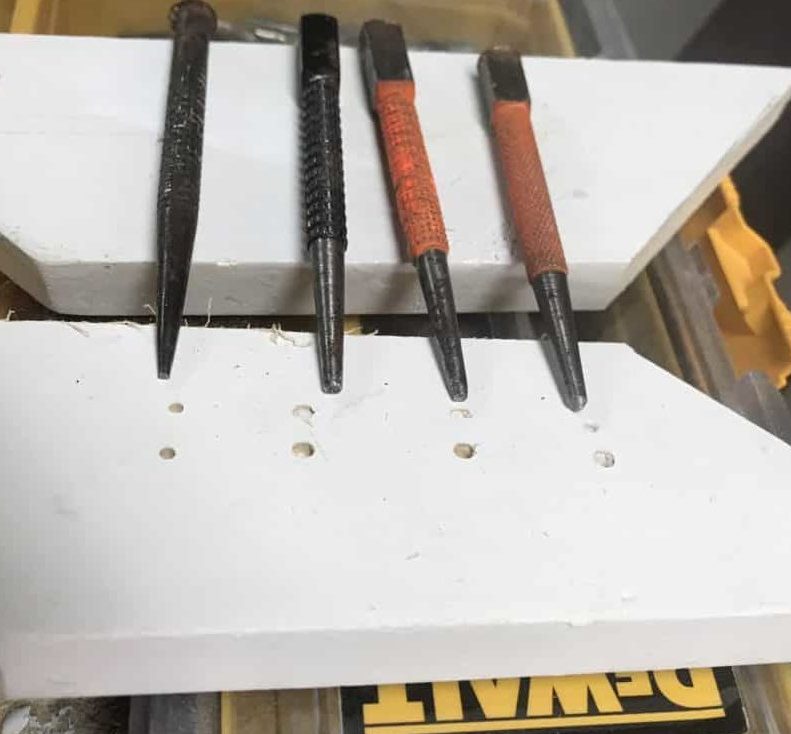
Nail sets come in various sizes, and knowing which one to choose can be confusing. Smaller nail sets are ideal for delicate work, ensuring precision without damaging the surface. Larger ones are useful for bigger nails where more force is required. Consider the type of nail you’re working with and the material it’s going into.
Material Matters
The material of the nail set is an important factor. Steel nail sets are durable and withstand heavy use, while brass ones are softer and less likely to mar surfaces. Think about the longevity and the type of projects you usually undertake. Opt for a material that complements your work style and needs.
Comfort And Grip
A comfortable grip can make a world of difference in your nail setting experience. Look for ergonomic designs that fit well in your hand and reduce fatigue. A smooth, non-slip grip ensures better control. Have you ever struggled with a tool that slips? A good grip can prevent accidents and improve accuracy.
Brand Reputation
Brand reputation can guide you toward a reliable nail set. Trusted brands often provide better quality and customer support. Check reviews and ratings before purchasing. You wouldn’t want to compromise on quality, would you? Investing in a well-regarded brand can save you time and frustration.
Price Vs. Quality
Balancing price and quality is key. While it might be tempting to go for the cheapest option, it might not offer the durability you need. On the other hand, high-end nail sets can be unnecessarily expensive. Assess your budget and project requirements carefully to find a nail set that offers the best value.
Choosing the right nail set might seem daunting, but with these insights, you can make an informed decision. Remember, the right tool can enhance your workmanship and bring your project to life.

Credit: www.reddit.com
Essential Safety Precautions
Ensure safety by wearing protective eyewear and gloves when using a tool nail set. Hold the nail securely to prevent slipping, and use a hammer with controlled force for accuracy. Keep your workspace organized to avoid accidents and maintain focus.
When using a tool nail set, safety should be your top priority. Even if you’re a seasoned DIY enthusiast, overlooking essential precautions can lead to mishaps. By taking a few simple steps, you can ensure a safe and efficient project. Let’s delve into some crucial safety tips that you should never skip.
Wear Protective Gear
Always protect your eyes and hands. Safety goggles shield your eyes from flying debris. A pair of sturdy gloves can prevent painful blisters and protect your hands from slipping. It’s amazing how a small investment in protective gear can make your project a lot safer.
Check Your Tools
Before you start, inspect your tools. Ensure that your nail set is free from rust or damage. A well-maintained tool is not just efficient but also safer to use. How often do you give your tools a once-over before diving into a project?
Maintain A Clean Workspace
A clutter-free workspace is essential. Clear away any unnecessary items to reduce the risk of tripping or accidental falls. A tidy area not only enhances your focus but also minimizes hazards. Could your workspace use a little tidying up?
Use The Right Nail Set For The Job
Choose a nail set that matches your project’s needs. Using the wrong size can lead to poor results and increase the chance of injury. Familiarize yourself with different sizes and their specific uses. Have you ever struggled with using the wrong tool?
Keep Your Hands And Fingers Safe
Be mindful of where you place your hands. Keep them clear of the striking area to avoid accidental hits. Developing a habit of checking hand placement can save you from painful mistakes. Have you ever had a close call by not paying attention?
Work In A Well-lit Area
Ensure your workspace is well-lit. Proper lighting helps you see clearly and work more efficiently. It reduces the risk of mistakes that could lead to accidents. Is your current lighting setup helping or hindering your projects? Remember, safety doesn’t take a back seat. Incorporating these precautions into your routine can make all the difference. Are you ready to prioritize safety in your next project?
Preparing Your Workspace
Before using a tool nail set, prepare your workspace properly. A well-organized and safe space enhances efficiency. It also ensures safety during work. Here’s how to set up your workspace effectively.
Organizing Your Tools
Keep all your tools within reach. Use a tool belt or a toolbox for easy access. Arrange them neatly to avoid clutter. Label each tool to find them quickly. This organization saves time and reduces stress.
Creating A Safe Environment
Ensure your workspace is well-lit. Good lighting prevents accidents and mistakes. Clear the area of any obstructions. This minimizes the risk of tripping. Keep a first-aid kit nearby for emergencies. Wear protective gear like gloves and goggles. Safety should always be a priority.
Step-by-step Nail Setting Process
Embarking on a DIY project or home renovation often requires the use of a tool nail set. This handy tool allows you to drive a nail below the surface of the wood, leaving a smooth finish that’s perfect for painting or staining. Understanding the nail setting process can make all the difference in achieving a professional-looking result. Let’s dive into the step-by-step nail setting process to help you master this skill.
Aligning The Nail Set
First, position the nail set directly over the head of the nail you wish to sink. It’s crucial to ensure that the nail set is perfectly aligned. Misalignment can lead to slipping or damaging the surrounding wood. If you’re working with a softwood, take extra care to avoid leaving dents.
Consider using a small piece of scrap wood as a guide to maintain alignment. This technique can save your project from unsightly marks and ensure precision. Have you ever tried setting a nail only to find it bent or crooked? Proper alignment is the secret to avoiding such mishaps.
Applying Proper Pressure
Once aligned, gently tap the nail set with a hammer to drive the nail below the surface. The pressure should be firm but controlled. Too much force can cause the nail to go too deep or split the wood.
Practice makes perfect. Start with a few test runs on spare wood to get a feel for the right amount of pressure. Remember, it’s easier to add more force than to undo a mistake. How confident are you with your hammer skills? This step is the perfect opportunity to sharpen them.
As you refine your technique, you’ll find the sweet spot of pressure that works best for different types of wood. Whether you’re working on a delicate trim or a sturdy deck, mastering this step will elevate your craftsmanship.
Each successful nail set is a step closer to completing your project with finesse. Are you ready to tackle your next woodworking challenge with newfound confidence?
Techniques For Different Materials
Using a nail set tool involves selecting the right size for the nail. Position it over the nail head. Gently tap with a hammer until the nail sits flush with the surface. This technique prevents damage to surrounding materials and ensures a clean finish.
When you’re working with a tool nail set, it’s crucial to understand that different materials require different techniques. Each material poses unique challenges, and using the right approach can make your project more efficient and effective. Let’s delve into the specifics of how to use a nail set with wood, metal, and concrete.
Wood
Wood is a forgiving material, but it still demands precision. Use a nail set to countersink nails, making them flush with the surface. This prevents any snags or damage to the wood’s finish. A tip: hold the nail set at a slight angle to avoid splitting the wood. Trust me, I’ve learned this the hard way during a home renovation when a straight approach led to a cracked panel. Think about the type of wood you’re working with. Softer woods like pine need less force, while hardwoods like oak require a firmer hand. Are you protecting the integrity of your wood pieces?
Metal
Using a nail set with metal is a different ball game. The key here is to use a sturdy nail set that can withstand the pressure. You’ll need to apply more force, so ensure your nail set is made of hardened steel. Consider wearing safety goggles to shield your eyes from flying metal shards. I’ve had a close call with a stubborn nail that taught me to never underestimate the power of safety gear. Does your metal surface have a protective coating? If so, be cautious not to damage it. A gentle tap might be all you need to maintain the surface’s integrity.
Concrete
Concrete is tough and requires a heavy-duty nail set. You might wonder, can a nail set really work with concrete? It can, but you’ll need patience and a hammer with a solid grip. Focus on using short, controlled taps to prevent chipping the concrete. One time, I rushed and ended up with a cracked foundation—it’s a mistake you don’t want to repeat. Is your concrete surface uneven? If so, angle your nail set slightly to ensure the nail goes in smoothly. This little adjustment can save you a lot of hassle. By adjusting your techniques according to the material, you can achieve seamless results with your tool nail set. What adjustments have you made in your approach that have made a noticeable difference?
Credit: www.bradthepainter.com
Troubleshooting Common Issues
Using a tool nail set can sometimes lead to issues. These problems can affect your project’s quality. Common issues include bent nails and surface damage. Understanding these issues helps you fix them. It also prevents them from happening again. Let’s explore these issues and their solutions.
Bent Nails
Bent nails occur when you hit them incorrectly. This happens if the nail is not straight. It can also happen if the hammer strikes at a wrong angle. Make sure the nail set is aligned properly. Check the nail and hammer position before striking. Use steady, even pressure with the hammer. This keeps the nail from bending. If a nail bends, remove it carefully. Straighten it before trying again.
Surface Damage
Surface damage can ruin the look of your project. It happens if the hammer hits the wood too hard. The nail set can also cause damage if used incorrectly. Use gentle pressure to avoid dents and scratches. Ensure the nail set is the right size for the nail. Protect the surface by using a small cloth. Place it over the area before using the tool. This helps minimize damage.
Maintaining Your Nail Set
Maintaining your nail set ensures long-lasting performance and reliable results. Proper care keeps your tools in top condition. It also reduces the risk of damage. With simple steps, you can prolong their lifespan. This means more efficient work and better outcomes. Below are practical tips to help maintain your nail set effectively.
Cleaning Tips
Clean your tools after every use. Use a soft cloth to wipe them down. This removes dirt and debris. For stubborn grime, use a gentle brush. Avoid harsh chemicals. They can damage the surface. Instead, opt for mild soap and water. Dry tools thoroughly to prevent rust. Moisture can cause corrosion. Regular cleaning keeps your tools in great shape.
Storage Solutions
Store your nail set in a dry place. Avoid damp environments. Moisture can lead to rust. Use a toolbox or storage case. This protects tools from dust and damage. Keep them organized. Arrange by size or type. This makes them easy to find. Label the storage compartments. This helps in quick identification. Proper storage extends tool life significantly.

Credit: www.familyhandyman.com
Frequently Asked Questions
What Is A Tool Nail Set Used For?
A tool nail set is used to drive nails below the surface. It helps create a smooth finish for woodworking projects. Ideal for tasks requiring a flush surface, like trim work. It ensures nails do not protrude, preventing damage or injury.
How Do You Use A Nail Set Tool?
Place the nail set on the nail head and strike it. This drives the nail below the surface. Use gentle, controlled taps to avoid splitting wood. Ensure the nail set matches the nail size for best results. Always wear safety goggles when using this tool.
Can A Nail Set Prevent Wood Damage?
Yes, a nail set prevents wood damage by driving nails below the surface. This reduces the risk of splitting wood. It allows for a smooth finish without protruding nails. Proper use ensures nails are hidden and secure, preserving the wood’s appearance.
What Materials Can You Use A Nail Set On?
A nail set can be used on wood, drywall, and soft materials. It’s perfect for cabinetry, trim work, and furniture. Ensure the material is thick enough to avoid splitting. Always choose the right nail size for the project to ensure effectiveness.
Conclusion
Using a tool nail set improves your DIY projects. It helps ensure nails are flush with surfaces. This prevents injuries and gives a neat finish. Remember to choose the right size for your nails. Practice makes perfect, so keep trying.
Safety should always be your top priority. Wear safety goggles and gloves. Always follow instructions carefully. With these tips, you’ll soon handle a nail set confidently. Your projects will look more professional. Enjoy the satisfaction of a job well done.
Happy nailing!
As an Amazon Associate I earn from qualifying purchases.