
As an Amazon Associate I earn from qualifying purchases.
Changing tires can be quick or time-consuming. It depends on skill level and equipment.
Knowing how long it takes to change tires is useful for many drivers. You might be facing a flat tire on the road or doing routine maintenance at home. The time needed can vary, but having an estimate helps plan your day better.
Whether you’re a seasoned mechanic or a first-timer, understanding the process is important. This blog will break down the factors affecting tire change time. You will learn what to expect and how to prepare. Let’s dive into the details and get you ready for your next tire change.
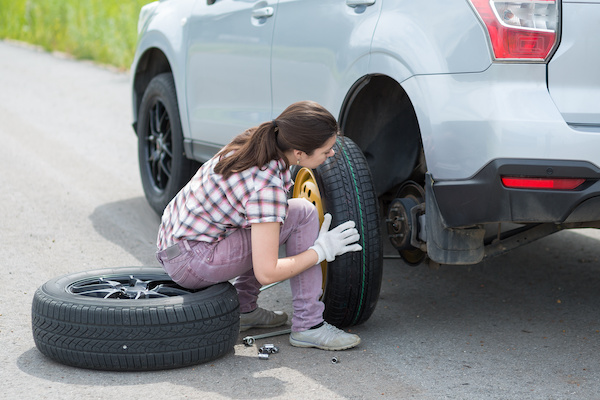
Credit: www.autocliniccare.com
Introduction To Tire Changing
Changing tires might seem like a daunting task, but it is a necessary skill for every driver. Knowing how to change a tire not only saves time and money but also ensures safety on the road. Many drivers overlook this essential skill, leading to unnecessary delays and potential hazards. Understanding the basics of tire changing can empower you to handle unexpected situations efficiently.
Importance Of Timely Tire Changes
Timely tire changes are crucial for maintaining vehicle safety and performance. Worn-out tires can lead to reduced traction, longer braking distances, and increased risk of blowouts. Regular tire inspections and timely replacements ensure a smooth and safe driving experience. Safety is the most important reason to change tires on time.
Besides safety, timely tire changes can also improve fuel efficiency. Worn tires can cause your vehicle to work harder, consuming more fuel. Replacing tires at the right time helps in reducing fuel consumption. This saves money in the long run.
Common Reasons For Tire Replacement
Several factors can lead to the need for tire replacement. Here are the most common reasons:
- Tread Wear: Tires wear down with time and usage. The tread depth decreases, leading to reduced grip.
- Damage: Punctures, cuts, or sidewall damage can render a tire unsafe.
- Age: Even if not heavily used, tires degrade over time. Rubber breaks down, making old tires unsafe.
- Uneven Wear: Poor alignment or suspension issues can cause tires to wear unevenly. This reduces their lifespan.
- Performance Needs: Different driving conditions might require specific types of tires. For example, winter tires for snowy conditions.
Understanding these common reasons helps in making informed decisions about tire replacements. Regular checks and maintenance can prevent unexpected tire issues.

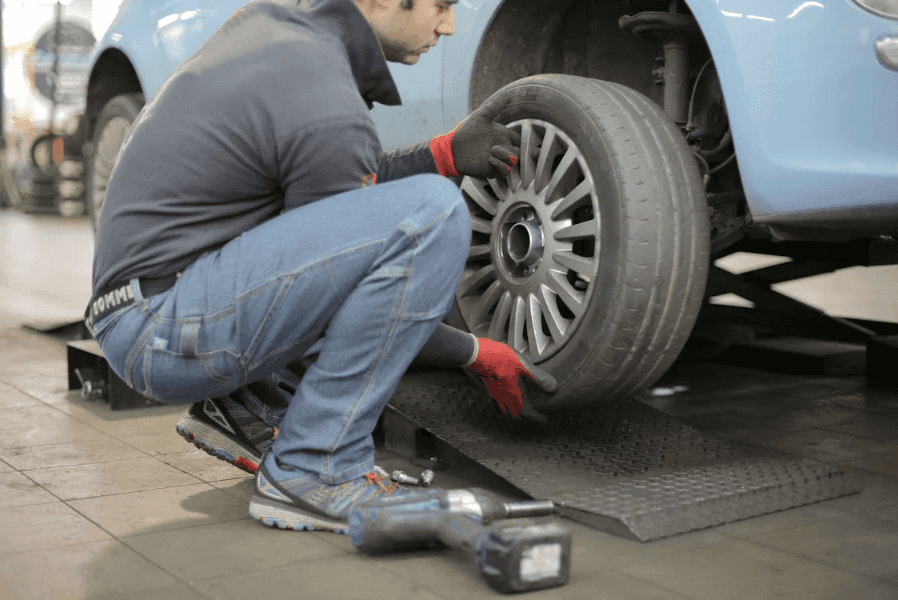
Credit: www.bridwellautocenter.com
Preparing For Tire Change
Changing a tire is an essential skill for every driver. Being prepared before you start can save time and ensure safety. This section covers the necessary tools and equipment and the safety precautions you need to take.
Necessary Tools And Equipment
Having the right tools is crucial for a smooth tire change. Here is a list of what you need:
- Spare tire: Ensure it is in good condition.
- Jack: A hydraulic or scissor jack works well.
- Lug wrench: Also known as a tire iron.
- Wheel wedges: To prevent the car from rolling.
- Flashlight: Useful for low-light conditions.
- Gloves: Protect your hands from dirt and injuries.
- Car manual: For specific instructions related to your vehicle.
Safety Precautions
Your safety is the top priority during a tire change. Follow these precautions to stay safe:
- Park on a flat surface: Ensure the car is on level ground.
- Engage the parking brake: Prevents the car from moving.
- Turn on hazard lights: Makes your car visible to other drivers.
- Use wheel wedges: Place them in front of and behind the tires.
- Loosen lug nuts slightly: Do this before jacking up the car.
- Never go under the car: Stay clear to avoid accidents.
By preparing with the right tools and following safety precautions, you can change your tire quickly and safely. Always keep these items in your car and practice these steps regularly.
Step-by-step Tire Changing Process
Changing a tire might seem daunting, but with a clear step-by-step process, it becomes manageable. Follow these steps to ensure you change your tire safely and efficiently.
Loosening Lug Nuts
First, make sure the car is on a flat surface. Use a lug wrench to loosen the lug nuts on the flat tire. Turn the wrench counter-clockwise to loosen. Do not remove the nuts completely yet.
Lifting The Vehicle
Use a jack to lift the vehicle off the ground. Place the jack under the car’s frame near the tire that needs changing. Consult your car’s manual for the correct jack placement.
Lift the car until the tire is about six inches off the ground. This will give you enough space to remove the tire and install the spare.
By following these steps, you can ensure a smooth and safe tire-changing process. Remember to work slowly and carefully.
Removing The Old Tire
Changing a tire can seem like a daunting task. The first step is removing the old tire. This process involves a few key steps. Each one is crucial for a smooth and safe tire change. Below, we’ll break down the steps into easy-to-follow parts.
Taking Off Lug Nuts
Start by loosening the lug nuts. Use a lug wrench for this. Turn the lug nuts counterclockwise. Do not remove them completely just yet. Just loosen them enough so they can be removed by hand later. This makes it easier to take off the tire once the car is raised.
Pulling Off The Tire
With the lug nuts loosened, it’s time to raise the car. Use a car jack for this step. Place the jack under the car’s frame near the tire. Lift the car until the tire is off the ground. Now, remove the lug nuts completely. Keep them in a safe place. Finally, pull the tire off the car. It might need a little force. Your old tire is now off and ready to be replaced.
Installing The New Tire
Installing the new tire is a crucial step in the tire-changing process. This part ensures your vehicle can safely return to the road. Let’s break down the process into two main tasks: positioning the new tire and tightening the lug nuts.
Positioning The New Tire
First, align the new tire with the wheel hub. Lift the tire and gently position it onto the hub. Make sure the holes in the tire match the wheel bolts. This alignment is essential for a secure fit. Take your time with this step. It sets the foundation for the rest of the installation.
Tightening Lug Nuts
After positioning the tire, it’s time to secure it. Start by hand-tightening the lug nuts. Use a crisscross pattern to ensure even pressure. This pattern prevents the tire from wobbling. Once the nuts are hand-tight, use a wrench to tighten them further. Again, follow the crisscross pattern. Tighten each nut in small increments. This method ensures the tire is firmly attached. Finally, lower the vehicle and give the nuts a final tightening check.
Lowering The Vehicle
Lowering a vehicle to change tires usually takes about 15-30 minutes. The process involves lifting the car with a jack, removing the old tires, and installing new ones. Proper tools and some experience can make it quicker and easier.
After changing the tire, the next step is lowering the vehicle. This stage is crucial because it ensures your car returns to the ground safely. When you lower the vehicle, make sure everything is stable and secure.
Using The Jack
Using the jack correctly is very important. Start by placing the jack handle back into the jack. Slowly turn the handle counterclockwise. This action will lower the vehicle gradually. Be sure to keep an eye on the vehicle as it descends. Ensure it lands evenly on all four tires.
Final Lug Nut Tightening
Once the vehicle is back on the ground, focus on the lug nuts. Use a lug wrench to tighten them further. Start with one lug nut, then move to the opposite one. This pattern ensures even pressure. Continue tightening until all lug nuts are secure.
Remember, loose lug nuts can be dangerous. So, double-check each one for safety.
“`
Post-tire Change Tips
Changing tires is just the beginning of your car’s maintenance. After swapping out your tires, there are several steps you should take. These steps ensure your tires are safe and function properly. Here are some post-tire change tips that you should follow.
Checking Tire Pressure
It’s crucial to check the tire pressure after changing your tires. Proper tire pressure ensures a smooth ride and prevents uneven wear. Use a tire pressure gauge to measure the pressure in each tire. Compare the readings with the manufacturer’s recommended levels.
- Remove the valve cap.
- Press the gauge onto the valve stem.
- Read the pressure on the gauge.
Adjust the pressure as needed. Add air if the pressure is low. Release air if the pressure is too high. This simple step can save you from future problems.
Inspecting For Leaks
After installing new tires, check for leaks. Leaks can cause the tires to deflate quickly. Here’s how to inspect for leaks:
- Mix water and soap in a spray bottle.
- Spray the mixture on the tire’s surface.
- Look for bubbles forming on the tire.
If you see bubbles, there’s a leak. Take your car to a professional if you find any leaks. Fixing leaks early can prevent bigger issues down the road.
Credit: www.gerrylanecdjr.com
Time-saving Tips And Tricks
Changing tires can seem like a daunting task, but it doesn’t have to be. With a few time-saving tips and tricks, you can make the process quicker and smoother. Whether you’re a seasoned car enthusiast or a first-time tire changer, these strategies will help you get back on the road in no time.
Organizing Your Tools
Before you start, gather all your necessary tools. This includes a jack, lug wrench, and spare tire. Keep everything in one place. This reduces the time spent searching for items. Organize your tools in a toolbox or a dedicated space in your garage. This ensures that you know where everything is. A well-organized tool set can save precious minutes.
Practicing The Process
Practice changing your tires when you have free time. Familiarity with the process will make it go faster when it counts. Practice using your jack and lug wrench. Learn the proper way to lift your car and remove the lug nuts. This will help you build confidence and speed. The more you practice, the quicker you will become. Practice makes perfect.
Frequently Asked Questions
How Long Does It Take To Change Tires?
Changing tires typically takes about 30 to 45 minutes for all four tires. This includes removing old tires, mounting new ones, and balancing them.
Can I Change My Tires Myself?
Yes, you can change your tires yourself. Make sure to have the right tools and follow safety guidelines.
What Tools Do I Need To Change Tires?
You need a jack, lug wrench, wheel chocks, and a spare tire. An air compressor and torque wrench are also helpful.
How Often Should Tires Be Changed?
Tires should be changed every 6 years or when tread depth is below 2/32 inches. Regular checks are essential.
Conclusion
Changing tires takes time, but it’s manageable. A professional can change them quickly. Around 30 minutes for all four tires. If you do it yourself, it could take longer. Preparation helps speed up the process. Tools and a little practice make a big difference.
Always ensure safety first. Check everything twice. Proper maintenance extends tire life. Save time and money in the long run. Remember, practice makes perfect. Soon, you’ll be faster and more efficient. Happy driving!
As an Amazon Associate I earn from qualifying purchases.